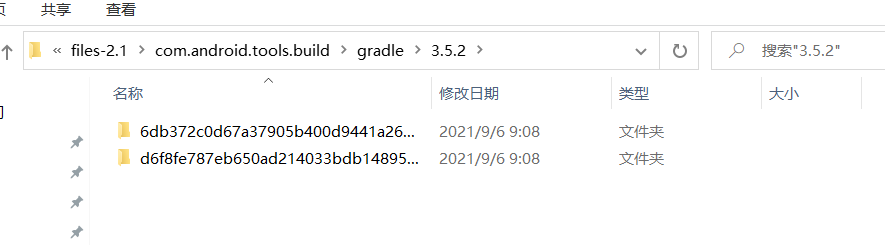
路径:D:\SoftWare\AndroidStudio\Gradle\caches\modules-2\files-2.1\com.android.tools.build\gradle\3.5.3\d691064e7d03aae18e3d13b03c76c3fef9b2c252\gradle-3.5.3-sources.jar
在gradle/3.5.3的目录下会有两个目录 一个存放的是class文件 一个存放的java文件。
这里我结合了别人的博客,让我更加快速的学习:https://juejin.cn/post/6963527524609425415#heading-0
as提供了一个processDebugManifest的任务供我们使用,那他的源码在哪里呢:
我目前跟到最接近的地方是:ProcessApplicationManifest.java文件的:
可以看到在创建CreationAction的时候他们根据VariantScope动态拼接了我们的task任务名字,已经定义死的名字是process 和 Manifest。然后根据我们打的时release包还是debug包,拼接出完整的名字。也就是我目前想找的 processDebugManifest任务。
1
2
3
4
5
6
7
8
9
10
11
public CreationAction ( @NonNull VariantScope scope, // TODO : remove this variable and find ways to access it from scope. boolean isAdvancedProfilingOn) super ( scope, scope.getTaskName("process" , "Manifest" ), ProcessApplicationManifest.class); this .variantScope = scope; this .isAdvancedProfilingOn = isAdvancedProfilingOn; }
VariantManager.java -> createAndroidTasks() -> createTasksForVariantData()
ApplicationTaskManager.java 执行; createMergeApkManifestsTask ->
TaskManager.java 执行了 createMergeApkManifestsTask -> createMergeManifestTask()
首先在BasePlugin.java的apply方法 这是一个入口函数:执行basePluginApply 这个函数很重要,它去创建了我们的全部的任务。
1
2
3
4
5
6
7
public final void apply (@NonNull Project project) CrashReporting.runAction( () -> { basePluginApply(project); pluginSpecificApply(project); }); }
在basePluginApply里面执行了:createTasks方法,创建全部任务:
1
2
3
4
5
6
7
8
9
10
11
12
13
14
15
16
17
18
19
20
private void basePluginApply (@NonNull Project project) threadRecorder.record( ExecutionType.BASE_PLUGIN_PROJECT_CONFIGURE, project.getPath(), null , this ::configureProject); threadRecorder.record( ExecutionType.BASE_PLUGIN_PROJECT_BASE_EXTENSION_CREATION, project.getPath(), null , this ::configureExtension); threadRecorder.record( ExecutionType.BASE_PLUGIN_PROJECT_TASKS_CREATION, project.getPath(), null , this ::createTasks); }
1
2
3
4
5
6
7
8
9
10
11
12
13
14
15
16
17
18
19
private void createTasks () threadRecorder.record( ExecutionType.TASK_MANAGER_CREATE_TASKS, project.getPath(), null , () -> taskManager.createTasksBeforeEvaluate()); project.afterEvaluate( CrashReporting.afterEvaluate( p -> { sourceSetManager.runBuildableArtifactsActions(); threadRecorder.record( ExecutionType.BASE_PLUGIN_CREATE_ANDROID_TASKS, project.getPath(), null , this ::createAndroidTasks); })); }
从 createTasks() 可以看到,createAndroidTasks() 是在afterEvalutate() 中执行的。
**createAndroidTasks()**方法有点长,我这里只关心一行代码 VariantManager.createAndroidTasks()
1
2
3
final void createAndroidTasks () List<VariantScope> variantScopes = variantManager.createAndroidTasks(); }
1 2 3 4 5 6 7 8 9 10 11 12 13 14 15 16 17 18 19 20 21 22 23 public List<VariantScope> createAndroidTasks () variantFactory.validateModel(this ); variantFactory.preVariantWork(project); if (variantScopes.isEmpty()) { populateVariantDataList(); } taskManager.createTopLevelTestTasks(!productFlavors.isEmpty()); for (final VariantScope variantScope : variantScopes) { createTasksForVariantData(variantScope); } taskManager.createSourceSetArtifactReportTask(globalScope); taskManager.createReportTasks(variantScopes); return variantScopes; }
为应用生成不同的包名:
1 2 3 4 5 6 7 8 9 10 11 12 13 14 15 productFlavors { pro { applicationId = "com.example.my.pkg.pro" } free { applicationId = "com.example.my.pkg.free" } } buildTypes { debug { applicationIdSuffix ".debug" } }
我们在创建android工程的时候,为什么每次主应用第一行写的都是 apply plugin:com.android.application 呢?
现在我们来分析下:
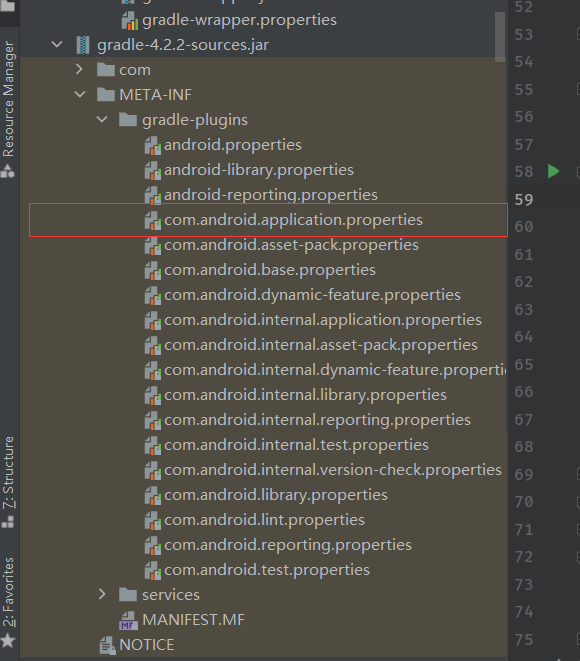
apply plugin 代表我们要为这个工程引入插件这个插件的具体指向叫com.android.application,打开gradle-4.2.2-sources.jar(注意这个jar包是android的gradle插件包:https://developer.android.google.cn/reference/tools/gradle-api 我们在META-INF/gradle-plugins里面可以找到文件com.android.application.properties文件:
打开这个文件内容写着:implementation-class=com.android.build.gradle.AppPlugin。可以知道插件的实现类是AppPlugin。现在也就知道了通过apply plugin:com.android.application 实际是导入了AppPlugin这个插件。在这个插件里面干了很多事情,比如创建了我们的扩展参数 android。。。。
现在来分析下这个扩展参数 android 是怎么被创建出来的
Android必须添加的插件是AppPlugin.java,在createExtension里面创建了扩展参数android,这也是我们android很重的一个配置参数。
1
2
3
4
5
6
7
8
9
10
11
12
13
14
15
16
17
18
19
20
21
22
23
24
25
26
27
28
29
30
31
32
33
protected BaseExtension createExtension( @NonNull DslServices dslServices, @NonNull GlobalScope globalScope, @NonNull DslContainerProvider<DefaultConfig, BuildType, ProductFlavor, SigningConfig> dslContainers, @NonNull NamedDomainObjectContainer<BaseVariantOutput> buildOutputs, @NonNull ExtraModelInfo extraModelInfo) { if (globalScope.getProjectOptions().get(BooleanOption.USE_NEW_DSL_INTERFACES)) { return (BaseExtension) project.getExtensions() .create( ApplicationExtension.class , "android" , BaseAppModuleExtension.class , dslServices, globalScope, buildOutputs, dslContainers.getSourceSetManager(), extraModelInfo, new ApplicationExtensionImpl(dslServices, dslContainers)); } return project.getExtensions() .create( "android" , BaseAppModuleExtension.class , dslServices, globalScope, buildOutputs, dslContainers.getSourceSetManager(), extraModelInfo, new ApplicationExtensionImpl(dslServices, dslContainers)); }
问题来了,project.getExtensions().create()这个方法到底是如何实现创建我们的扩展参数的?
现在咱们就来探究下~
由于Project是一个接口,那么首先我们得搞清楚这个Projectd的具体实现类是谁,调用下面这个任务我们就可以知道了:
1
2
3
4
5
task getProjectClassType{ println(project.class ) }
知道了Project其实就是DefaultProject.java,现在就跟到DefaultProject里面查看getExtensions()方法:
DefalultProject.java
1
2
3
4
@Override public ExtensionContainerInternal getExtensions () return (ExtensionContainerInternal) getConvention(); }
这个ExtensionContainerInternal是一个接口,那么我们如何知道他的具体实现类呢:
1
2
3
4
task getConversionClassType{ println(project.getConvention()) }
通过上面代码我们知道了调用getConvention()实现返回的是DefaultConvention.java类。
通过以上步骤我们清楚了调用project.getConvention()实际是获取到对象DefaultConvention.java类。
现在进入DefaultConvention查看create的实现过程:
1 2 3 4 5 6 7 8 9 10 11 12 13 14 15 16 17 18 @Override public <T> T create (Class<T> publicType, String name, Class<? extends T> instanceType, Object... constructionArguments) { return create(typeOf(publicType), name, instanceType, constructionArguments); } @Override public <T> T create (TypeOf<T> publicType, String name, Class<? extends T> instanceType, Object... constructionArguments) { T instance = instantiate(instanceType, name, constructionArguments); add(publicType, name, instance); return instance; } private <T> T instantiate (Class<? extends T> instanceType, String name, Object[] constructionArguments) { return instanceGenerator.newInstanceWithDisplayName(instanceType, Describables.withTypeAndName("extension" , name), constructionArguments); }
通过这几部的创建过程可以分析出在调用project.getExtensions().create()里面传递的参数含义:
1
2
3
4
5
6
7
8
9
10
11
project.getExtensions() .create( "android" , BaseAppModuleExtension.class , dslServices, globalScope, buildOutputs, dslContainers.getSourceSetManager(), extraModelInfo, new ApplicationExtensionImpl(dslServices, dslContainers)); }
“android” : 我们在build.gradle里面具体使用的插件名称
BaseAppModuleExtension.class : 插件具体实例对象
dslService,globalScope,buildOutputs,dslContainers.getSourceSetManager(),extraModelInfo。。: 创建实例对象他所需要的参数
通过分析得出:build.gradle里面的android{} 他的具体实例对象是BaseAppModuleExtension,所以我们知道哪些参数可以让我们使用时候就直接到BaseAppModuleExtension这个类取找。
1
2
3
4
5
6
7
8
9
10
11
12
13
14
15
16
17
18
open class BaseAppModuleExtension ( dslServices: DslServices, globalScope: GlobalScope, buildOutputs: NamedDomainObjectContainer<BaseVariantOutput>, sourceSetManager: SourceSetManager, extraModelInfo: ExtraModelInfo, private val publicExtensionImpl: ApplicationExtensionImpl ) : AppExtension ( dslServices, globalScope, buildOutputs, sourceSetManager, extraModelInfo, true ) , InternalApplicationExtension by publicExtensionImpl }
像applicationId , versionCode , versionName , minSdkVersion , targetSdkVersion , maxSdkVersion 等等这些值都保存在类ProductFlavor.kt
1
2
3
4
5
6
7
8
9
10
11
interface InternalBaseVariant : BaseVariant { override fun getMergedFlavor () interface MergedFlavor : GradleToolingModelProductFlavor { override val testInstrumentationRunnerArguments: MutableMap<String, String> override val manifestPlaceholders: MutableMap<String, Any> override val resourceConfigurations: MutableCollection<String> override val proguardFiles: MutableList<File> override val consumerProguardFiles: MutableList<File> override val testProguardFiles: MutableList<File> } }
1 AndroidArtifactVariantImpl
AppPlugin里面先执行了configureExtension()方法,createVariantFactory这个方法去创建了我们可以使用的参数信息。createExtension 方法去创建了android这个扩展属性
1
2
3
4
5
6
7
8
9
10
11
12
13
14
15
16
17
18
19
20
21
22
23
24
25
26
27
28
29
30
31
32
33
34
35
36
37
38
39
40
41
42
43
44
45
46
47
48
49
50
51
52
53
54
55
56
57
58
59
configuratorService.recordBlock( ExecutionType.BASE_PLUGIN_PROJECT_BASE_EXTENSION_CREATION, project.getPath(), null , this ::configureExtension); private void configureExtension () DslServices dslServices = globalScope.getDslServices(); final NamedDomainObjectContainer<BaseVariantOutput> buildOutputs = project.container(BaseVariantOutput.class); project.getExtensions().add("buildOutputs" , buildOutputs); variantFactory = createVariantFactory(projectServices, globalScope); variantInputModel = new LegacyVariantInputManager( dslServices, variantFactory.getVariantType(), new SourceSetManager( project, isPackagePublished(), dslServices, new DelayedActionsExecutor())); extension = createExtension( dslServices, globalScope, variantInputModel, buildOutputs, extraModelInfo); globalScope.setExtension(extension); VariantApiOperationsRegistrar<VariantBuilderT, VariantT> variantApiOperations = new VariantApiOperationsRegistrar<>(); androidComponentsExtension = createComponentExtension(dslServices, variantApiOperations); variantManager = new VariantManager( globalScope, project, projectServices.getProjectOptions(), extension, variantApiOperations, variantFactory, variantInputModel, projectServices); registerModels( registry, globalScope, variantInputModel, extension, extraModelInfo); variantFactory.createDefaultComponents(variantInputModel); createAndroidTestUtilConfiguration(); }
上面介绍了我们android的具体实现类是BaseAppModuleExtension,它继承自AppExtension,他又是继承自AbstractAppExtension,这个类很关键,看下代码:
1
2
3
4
5
6
7
8
9
10
11
12
13
14
15
16
17
18
19
20
21
22
23
abstract class AbstractAppExtension dslServices: DslServices, globalScope: GlobalScope, buildOutputs: NamedDomainObjectContainer<BaseVariantOutput>, sourceSetManager: SourceSetManager, extraModelInfo: ExtraModelInfo, isBaseModule: Boolean ) : TestedExtension( dslServices, globalScope, buildOutputs, sourceSetManager, extraModelInfo, isBaseModule ) { val applicationVariants: DomainObjectSet<ApplicationVariant> = dslServices.domainObjectSet(ApplicationVariant::class .java) override fun addVariant (variant: BaseVariant ) applicationVariants.add(variant as ApplicationVariant) } }
这里有一个很重要的参数:applicationVariants。我们在android里面的配置数据可以通过他来获取,比如版本号:
1
2
3
4
5
6
android.applicationVariants.all{variant-> variant.outputs.all{ println(variant.buildType.name) println(variant.versionName) } }
为什么可以获取到这些,可以看类ApplicationVariant,在它的父类都声明了这些属性的获取。
在Gradle里面有一个很重要的东西Variant(变体)。在AppPlugin你可以获取的变体是applicationVariants。在LibraryPlugin里面你可以获取的变体是libraryVariants。
1
2
3
4
5
val libraryVariants: DefaultDomainObjectSet<LibraryVariant> get () = libraryVariantList as DefaultDomainObjectSet<LibraryVariant>val applicationVariants: DomainObjectSet<ApplicationVariant> = dslServices.domainObjectSet(ApplicationVariant::class.java)
他们的类型还不通一个是LibraryVariant 一个是 ApplicationVariant;
1
2
3
4
5
6
7
8
9
10
public interface ApplicationVariant extends ApkVariant , TestedVariant public interface LibraryVariant extends BaseVariant , TestedVariant , InternalBaseVariant @Nullable @Deprecated Zip getPackageLibrary () ;
这是我们任何的仓库,所有的任务可以通过这个类扎到
他是管理我们dependency依赖
我们的project是继承他的,可以使用他的所有属性,比如最多的apply
每一个Transform的输出都是下一个transform的输入。并且还有一个很重要的一点,每一个自定义的Transform一定是在所有Transform之前执行,然后在得到所有java文件编译成class文件之后才执行。也因为这一点我们才可以进行插桩啥的。